In this post I will demonstrate a “Hello, World!” example for the micro:bit to light up some Neopixels. Neopixels are individually-addressable RGB LEDs and can come in various forms. The most common form is the chain having all units connected serially. It was invented by Adafruit, an open-source hardware company based in New York City.
Why did I chose the micro:bit? Of course, one could also use any member of the Arduino family instead. However, since I recently got a micro:bit v2 as a gift, I decided to give it a try and start my first mini-project based on this device, an open source ARM-based embedded system designed by the BBC for use in computer education in the U.K.

The LED strips have the advantage, that LEDs can easily be cut off at the desired length. Since every pixel can be adressed individually, these LEDs can also be used to create large-scale pixel-based displays. Numerous cool projects can be found on youtube when searching for “neopixel” or “neopixel display”. One of my top favourites is this, presented by GreatScott.

What you need
- 1 BBC Micro:Bit V1 or newer, i.e. buy here
- 1 Micro-USB-Cable, you can find everywhere
- A strip of some RGB LEDs based on the WS2812 / WS2811 or SK6812 drivers using a single-wire control protocol, i.e. buy here
- A breadboard to connect the Micro:Bit to the LED strip, i.e. buy here
- Some Solderless Breadbord Jumper Wires, Male to Male, i.e. buy here
- 3 Crocodile Clips, i.e. buy here
Setting up the Circuit
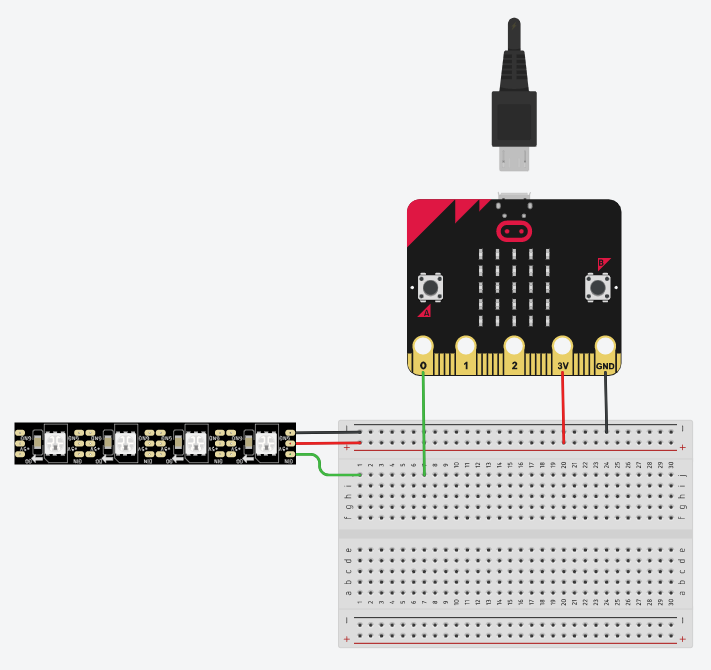
The following schematic drawing shows how to connect the micro:bit to the LED strip:
Hello World
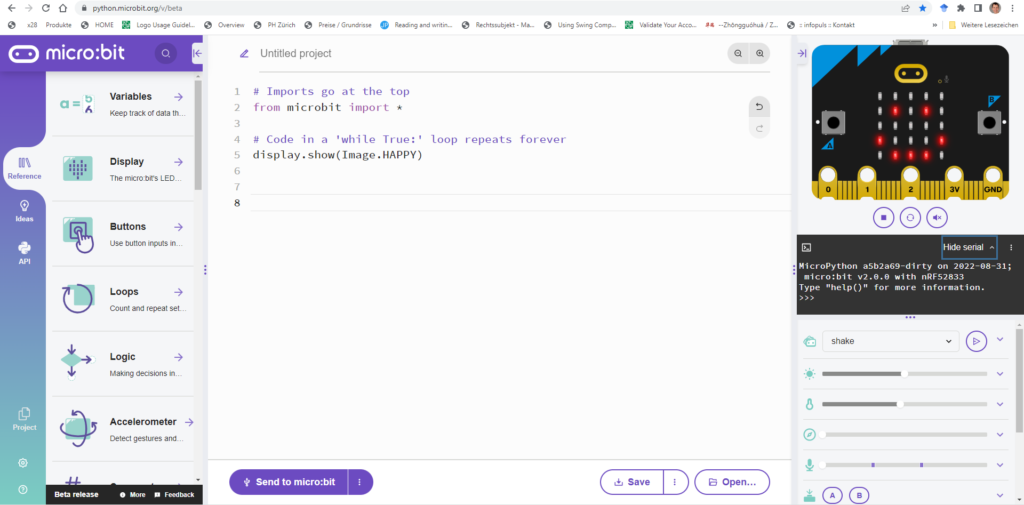
The good thing with the micro:bit is that you do not need to install any software in order to program it. Just go to https://python.microbit.org/v/beta and make sure you have connected your micro:bit via a micro USB cable and your’re done. Simple programs can even be tested using the online emulator shown in the upper right of the screen:
Congratulations¨! Now you’re ready to address the connected LEDs and start programming your micro:bit. The following script shows assumes, that you have connected 10 LEDs in serial. Copy the following source to your online IDE.
from microbit import *
import neopixel

np = neopixel.NeoPixel(pin0, 10)    # Instatiate a NeoPixel Object with 10 LEDs
np[0] = (255, 0, 0)                 # Set first LED to Red (Tuple with R, G, B)
np[1] = (0, 255, 0)                 # Set first LED to Green
np[2] = (0, 0, 255)                 # Set first LED to Blue

np.show()                           # Now send the Data to the LED-Chain
For each LED a 3-tuple has to be provided to indicate the red, green, blue components of the light to be emitted. LED 0 is the one nearest to the data-input line.
After invoking np.show(), the LEDs should imediately light up. If you want to address LED No. 10, you must also assign values to all preceding LEDs in the data model, otherwise the LED would not light up.
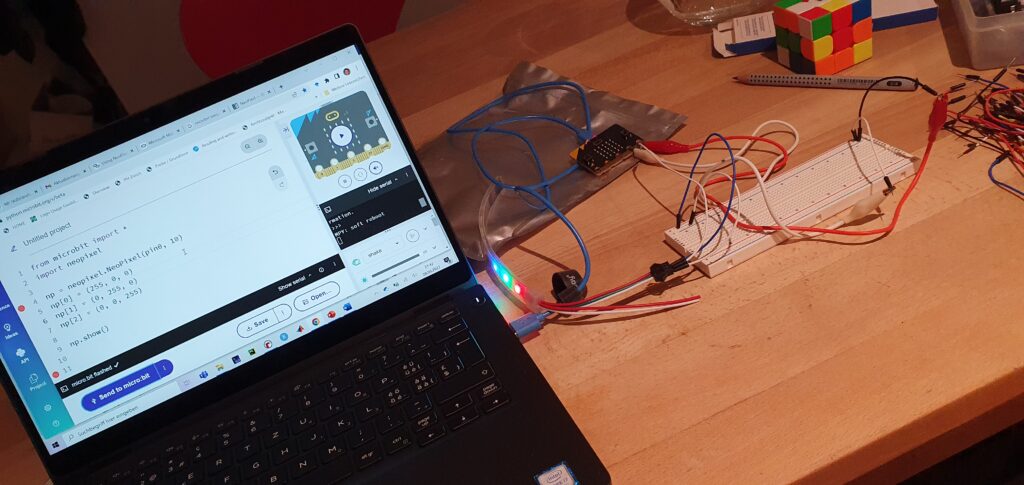
After having adapted the source to your needs and configuration, flash your device hitting the “Send to micro:bit” – button! The result should look somewhat like this: