In this post I’ll show you the simplest setup to generate synthetic sound using an Arduino Pro Mini. Of course you can also run it on a Leonardo or on an Arduino UNO R3. The project is inspired from a project from the official arduino project hub and you can get the sourcecode here.
What do I need?
- Arduino Pro Mini 5V ATmega328P or compatible, i.e. buy here
- Piezo Buzzer, i.e. buy here
- 9V Battery Clip, i.e. buy here
- USB connector cable (for the UNO R3, i.e. buy here or the Leonardo, i.e. buy here) or a Programmer (for the Pro Mini, i.e. buy here)
How to wire the components?
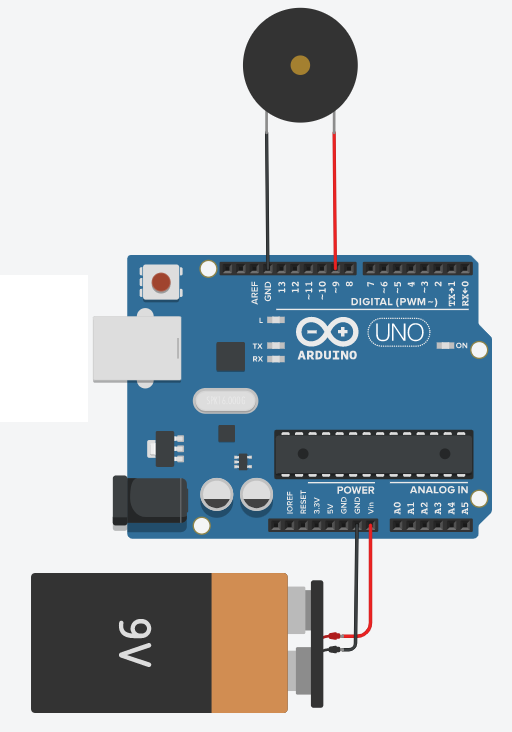
The piezo buzzer’s positive port has to be connected to GPIO pin 9 of the Arduino, whereas the negative port is connected to ‘GND’. The 9V battery clip’s positive port is connected to ‘Vin’ (on the UNO) or ‘RAW’ on the Pro Mini or Leonardo, the byttery’s negative port goes to GND as well. Which pin you choose to output the sound from, is of your free choice. The source code provided here defines the output to be directed to port 9 but of course you can choose any of the free pins which are not used for another purpose yet.
The following diagram visualizes the wiring of the components for the Arduino UNO, however, nothing changes when you connect the components to the Arduino Pro Mini or to an Arduino Leonardo:
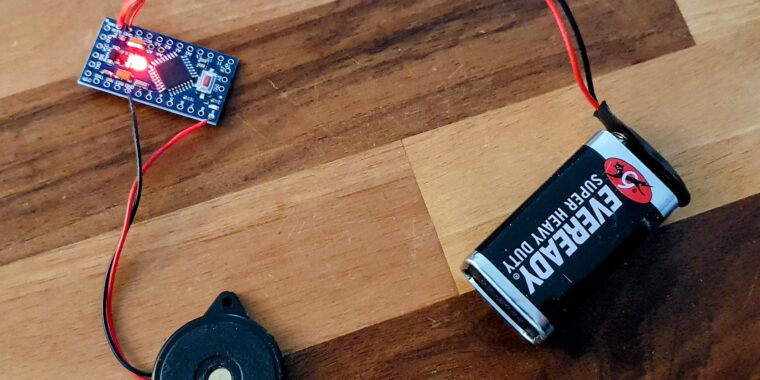
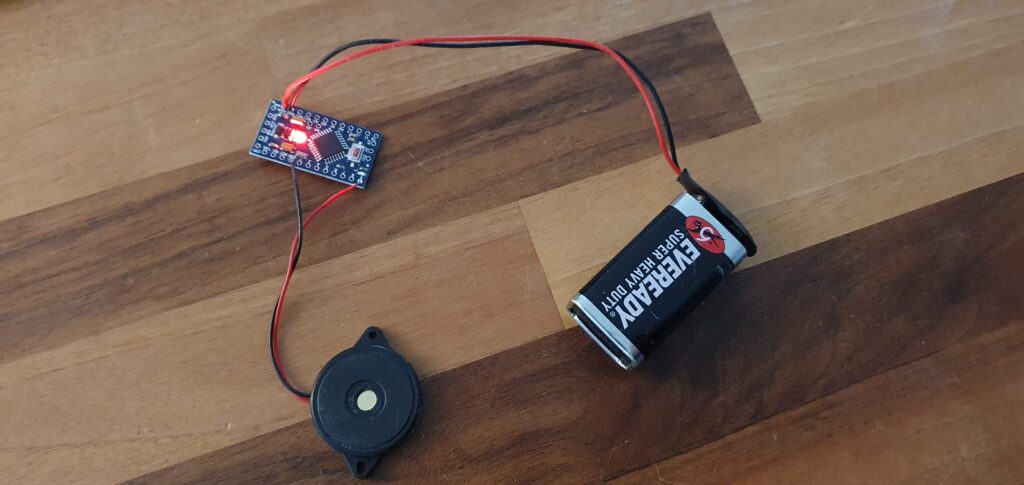
The following picture shows the wiring as it would look like in the case of an Arduino Pro Mini.
How to program the Arduino?
In order to program your Arduino, first disconnect the battery, if you already constructed the whole circuit. Now launch your Arduino IDE, connect the circuit to your PC and upload the source code provided here or copy it from the following source:
int speakerPin = 9;
int length = 29; // the number of notes
char notes[] = "GGAGcBGGAGdcGGxeccBAyyecdc ";

// calculate durations for each tone: subtract one beat for each pause between every two tones
// 10-1 = 1/16, 20-1 = 1/8, 30-1 = 3/16 = 1/8 *, 40-1=1/4, 80-1=1/2
int beats[] = { 29, 9, 39, 39, 39, 79, 29, 9, 39, 39,
                39, 79, 29, 9, 39, 39, 29, 9, 39, 39,
                29, 9, 39, 39, 39, 79, 159};

int tempo = 60;
bool played = false;

void playTone(int tone, int duration) {
  for (long i = 0; i < duration * 1000L; i += tone * 2) {
    digitalWrite(speakerPin, HIGH);
    delayMicroseconds(tone);
    digitalWrite(speakerPin, LOW);
    delayMicroseconds(tone);
  }

}

void playNote(char note, int duration) {
  char names[] = {'C', 'D', 'E', 'F', 'G', 'A', 'B',
                  'c', 'd', 'e', 'f', 'g', 'a', 'b',
                  'x', 'y'
                 };
  int tones[] = { 1915, 1700, 1519, 1432, 1275, 1136, 1014,
                  956,  834,  765,  593,  468,  346,  224,
                  635 , 715
                };
  int SPEE = 5;

  // play the tone corresponding to the note name
  for (int i = 0; i < 17; i++) {
    if (names[i] == note) {
      int newduration = duration / SPEE;
      playTone(tones[i], newduration);
    }
  }
}

void playMelody() {
    for (int i = 0; i < length; i++) {
    if (notes[i] == ' ') {
      delay(beats[i] * tempo); // rest
    } else {
      playNote(notes[i], beats[i] * tempo);
    }
    // pause between notes
    delay(tempo);
  }
}

void setup() {
  played = false;
  pinMode(speakerPin, OUTPUT);
}


void loop() {
    // play melody only once, require reset-button to replay
    if (!played) {
      playMelody();
      played = true;
    }
}
If you soldered the piezo buzzer to a GPIO pin different from 9 make sure to adapt the ‘speakerPin’ – variable in the source code. Make sure to choose the correct type of Arduino and the correct output port, where you have your Arduino connected to.
Congratulations! You have just successfully completed your first Arduino sound project!
Now, disconnect the device from your PC and connect the 9V battery. Once you have connected the 9V battery, you should now hear the happy birthday melody.