In this post I’ll show you how to build an arduino based math training console based on simple standard components. The app is suitable for training math in lower and middle school. It allows configuring difficulty level as well as operations and lets the player choose the correct result from a selection of 4 outcomes in a kind of multiple-choice question. An additional mode formulates tasks in the form of equations to make the complementary arithmetic operations more intuitive to understand.
What do you need?
- an arduino UNO R3 (genuino) or compatible (i.e. this one)
- an LCD1602 Module with 16×2 characters and 6 control buttons (i.e. see this one here)
- arduino IDE to upload the mathProfessor source code your arduino (get it here)
- a programmer and/or cable to connect your arduino to your pc’s USB port (depending on the arduino type you’re planning to use; for the arduino uno r3 an ordinary USB cable would be enough)
How to install and configure the arduino IDE you can learn here.
Let’s start!
Once you got the arduino Uno and the LCD display, mount the display shield on top of the arduino by aligning the pins on the right hand side of LCD and arduino board. Then connect the arduino to your computer. The backlight should immediately light up. If you don’t see any character dot matrix, subtly try increasing the contrast by turning the screw in the blue componet on the upper left corner of the LCD-shield in clockwise sense.
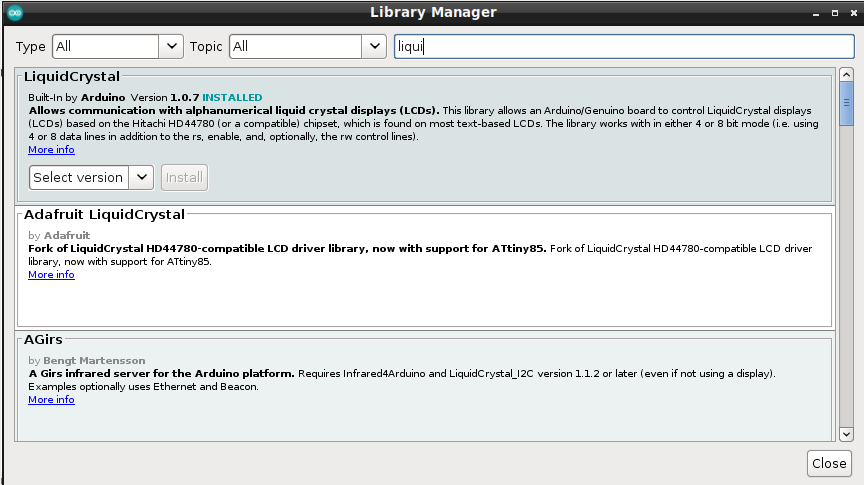
You’re now ready to load the program. The source is provided here on my github account. In the header section you can see the libraries needed:
#include <LiquidCrystal.h>
#include <EEPROM.h>
Make sure you have installed the libraries into your arduino IDE. Whereas the EEPROM library is typically delivered with the IDE, you might have to install the LiquidCrystal library:
After making sure the required libraries are made available, you can upload the code mathProfessor code to your arduino uno r3 with the display attached! Congratulations! Off you go!
How to use the App
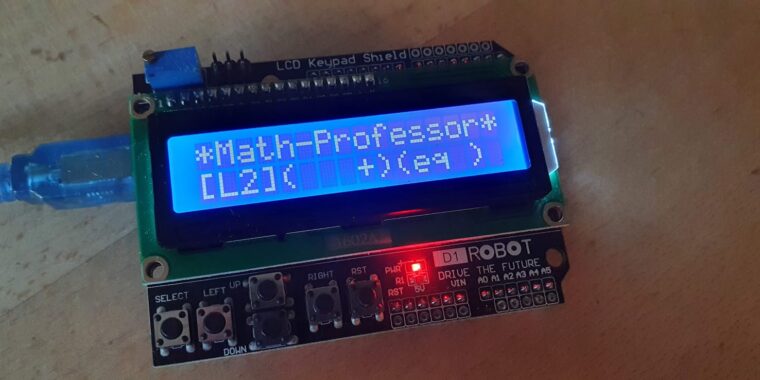
After launching the app and/or starting the arduino, you’ll get the home screen:
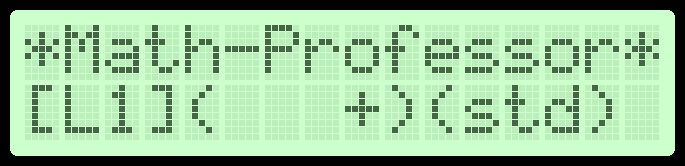
Use the LEFT/RIGHT keys to navigate in the menus and the UP/DOWN keys to modify the values. Press ‘SELECT’ to start a training session and RST (reset) to reset the app and return to the home screen shown above.

The menu consists of 3 submenus:
- Level submenu: L1 = Level 1 (numbers from 0 to 10), L2 = Level 2 (numbers from 0 to 20), L3 = Level 3 (numbers from 0 to 100), L4 = Level 4 (numbers from 0 to 1000)
- Operation submenu: Select the allowed math operations (+,-,*,:,+-,*:,+-*:)
- Equation submenu: std = Standard (no equations), eq = equations (math tasks in the kind of “3 + ? = 5” are asked
When you have made your choice for the level, operations and equations settings, press the SELECT button to go start training mode. You will be presented a computational task matching the specified settings:
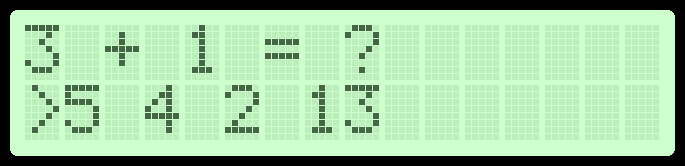
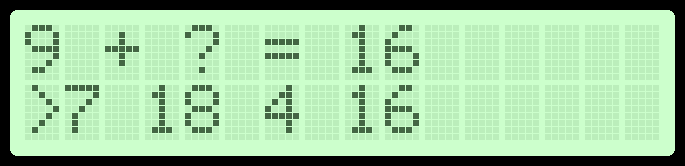
Now, again use the LEFT/RIGHT navigation buttons and the SELECT button to make your choice for the result. The following screen shows the type of equation-like questions you might be asked, when you choose ‘eq’ in the equation submenu:
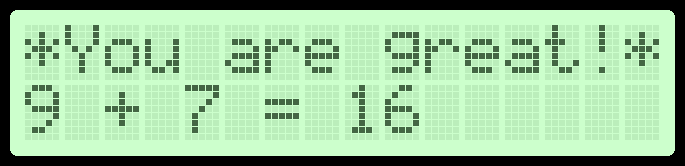
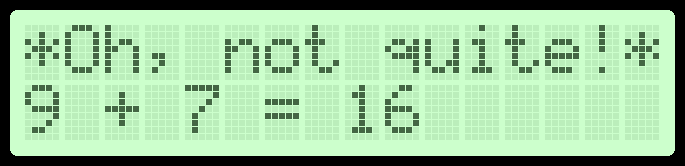
After having chosen the supposedly correct result with SELECT, you’ll see one of the following screens: