This post is for people who are no longer satisfied with Dropbox and want to migrate their data to an alternative cloud storage service. I’ll demonstrate how to configure Dropbox to synchronize the files down to a local drive. The post is based on windows 10 and on dropbox-client (115.4.601) as of February,9th 2021, the situation and screens may differ with newer versions of the dropbox-client, Apple PCs or Linux OSes.
Disclaimer: This post was written to the best of my knowledge, however I exclude any liability for data loss or damage caused by incorrect or outdated information on this page or by incorrect manipulations on your side. You take the full responsibility for any actions taken.
The History
Dropbox was one of the pioneers in the field of cloud services. The idea of having files accessible everywhere on all devices was a USP. The possibility of moving the entire data stock to the cloud and being freed from backup obligations was also a huge step.
But the development continues and other providers are entering the market. So it’s always worth comparing prices and services.
The following observations prompted me to look for an alternative solution:
- Dropbox’s prices have risen recently, but the range of functions has remained about the same
- the Web GUI is no longer up to date and has even become worse, usability and clarity have deteriorated in recent years
- shared storage is charged multiple times (as of 9th February, 2021)
- Dropbox has not managed to develop a useful photo archive solution
There are tons of providers now, with comparable functionality. I will not discuss the services of different cloud providers in this post. Just enter ‘dropbox alternatives’ in google and check the results. And don’t get trapped by advertisements of the big cloud-service providers but try to make your own scoring and decide on your own what service is best for you.
I have chosen Google Drive because I primarily want a good photo solution and since Dropbox has no solution for Photo-Browsing, Albums and the like, I decided to migrate my stuff to Google Drive. And Google’s service is even cheaper.
How to migrate your Data
It’s a bit tricky to get rid of Dropbox, but with a lot of research and trial and error I found a way, you can migrate your data from Dropbox. Essentially you have to do the following steps:
- Synch everything down form Dropbox
In this tutorial we will setup a dropbox-folder on a PC with enough space, to hold your complete Dropbox. I will show you how to configure Dropbox to completely synchronize your dropbox-data on a local drive. - Install new Synch-App on your PC
Install the new Synch-App from your alternative Solution - Synch everything into the “new Cloud”
Now choose the content, you want to synchronize to the new Cloud Service using the new Cloud-Provider’s Synch Application.
In this post I will focus on the first – most tricky – step in this post only. There are quite some obstacles to overcome:
1) Prepare your Dropbox Account for Data-Download
In order to make sure, the Dropbox-Synch App on your PC is forced to download all your files to your PC, you have to make sure, some settings are correct in the Dropbox-Web-GUI. Go to the Dropbox-Web-GUI, click on your avatar in the upper right corner of the window and choose the item ‘Settings’ (or ‘Einstellungen’ in German):
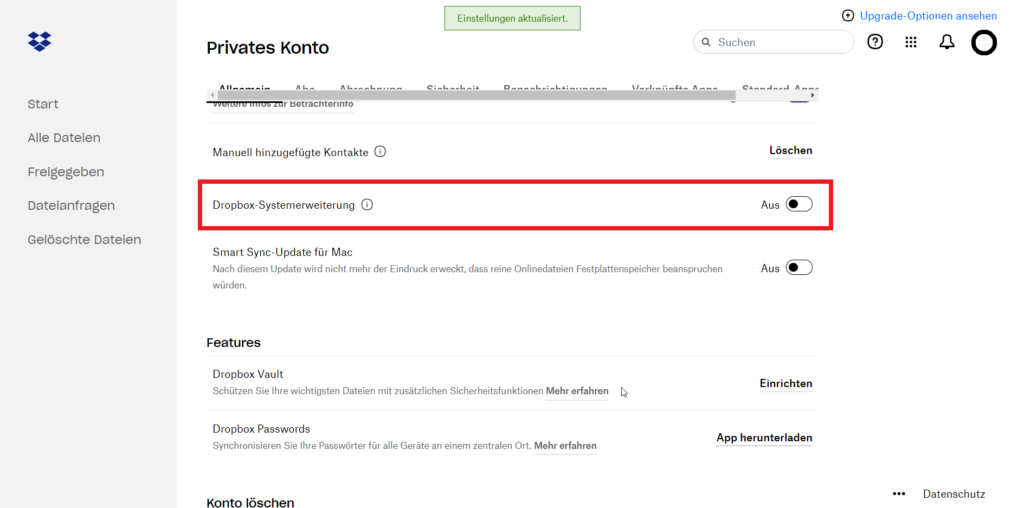
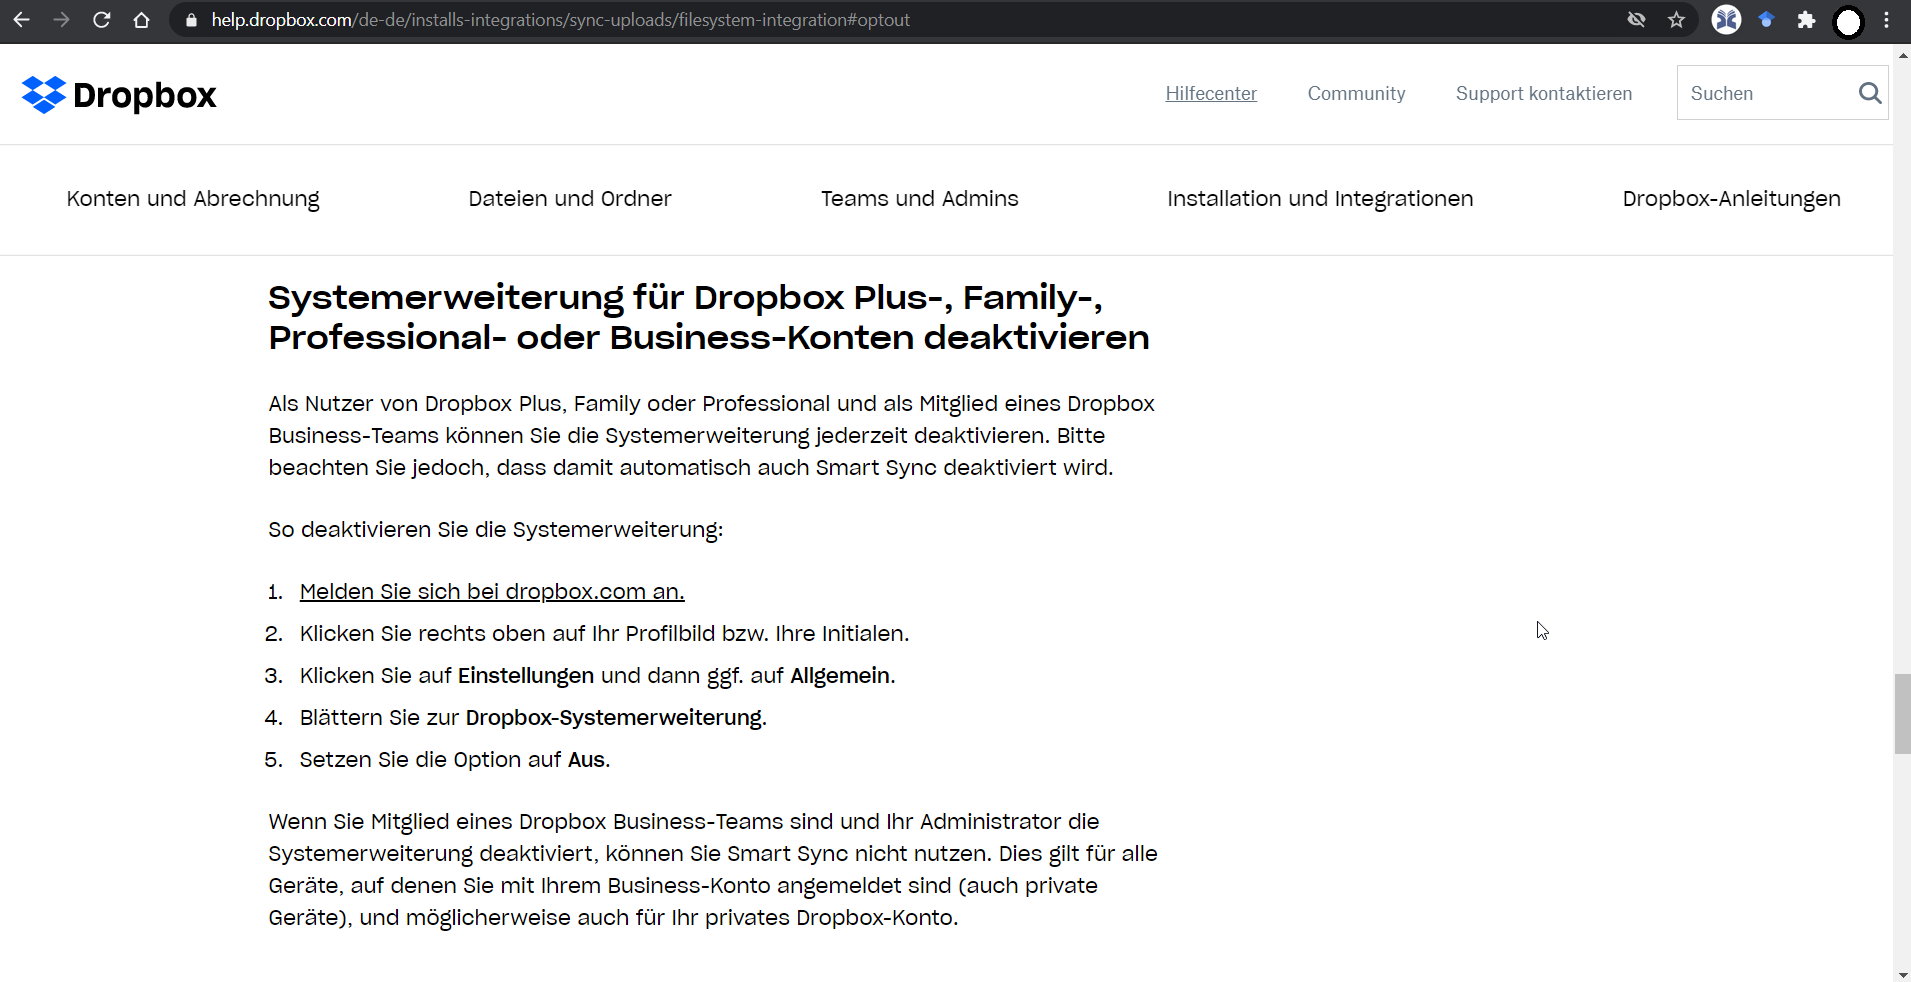
Make sure, this funcionality is disabled. The switch might have another description in your GUI, depending on your language settings (as of February, 9th, 2021, this process is described on the Dropbox website here, a conserved snapshot pdf of the description can be found here, a screenshot of the crucial section see here).
2) Install the Dropbox Synch App
This step is only necessary, if you haven’t yet installed the Synch App on your PC, otherwise proceed directly with step 3).
- Download the dropbox installer here.
- Start the installer App and wait (it might take some time, you will see a progress bar growing)
One of the first screens would show you something like this (screenshot from german version):
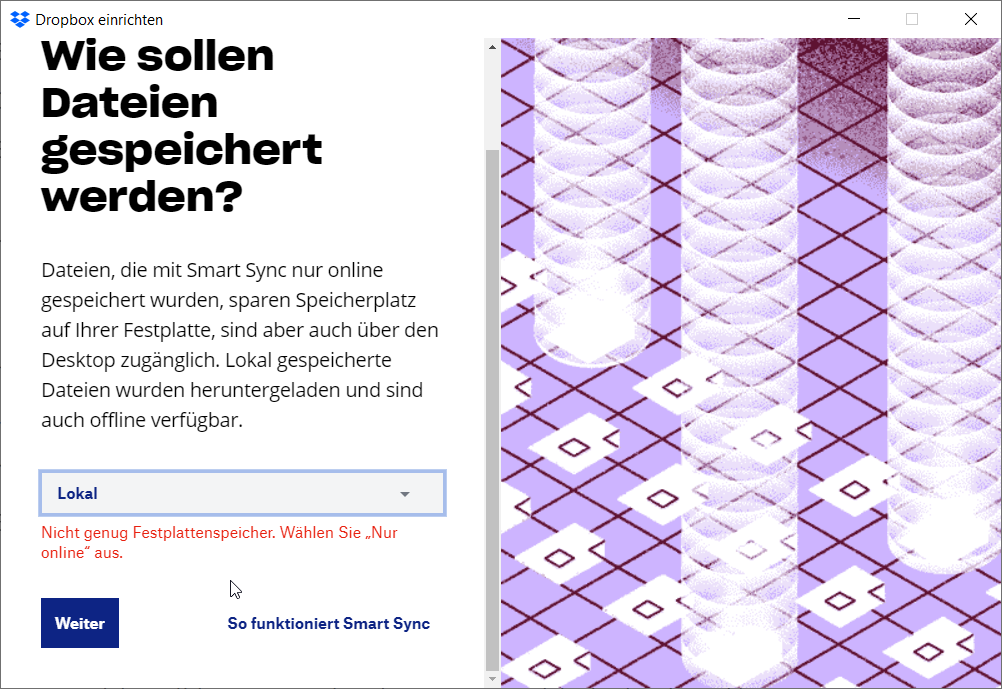
Here you can have 2 situations:
- a) Either you’re among the majority of us who don’t happen to have countless GB left on your C drive, or
- b) You happen to have enough space on your C drive to store your whole dropbox content
No matter, what situation you’re in, just proceed by selecting the option, to keep your files “online only” and choose ‘Next’.
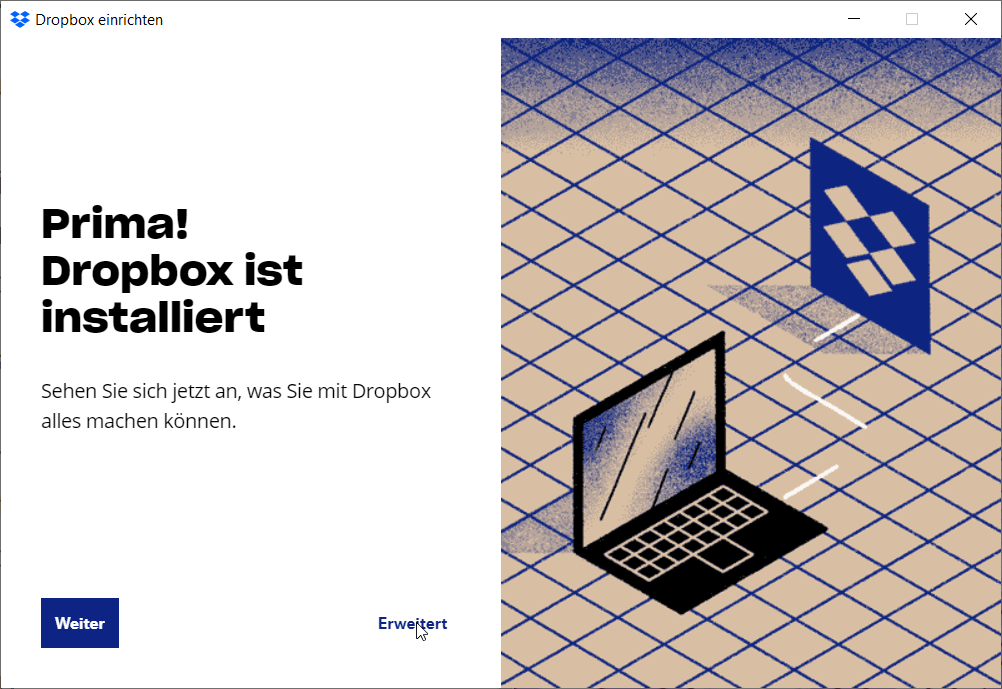
Now choose the option ‘Erweitert’ (probably something like ‘Extended’ or something in English?), which allows you to set another download location, where more space is available, i.e. an external harddrive or a big enough UBS stick. You’ll then see the following screen:
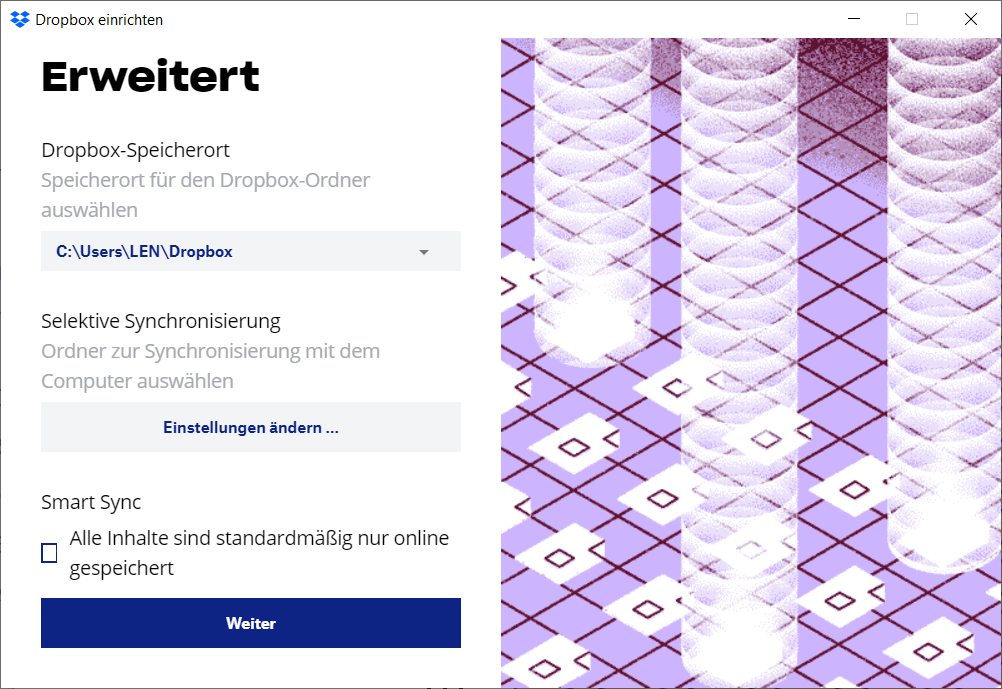
Here have to configure the following:
- Set the location of your Dropbox files
Choose a storage location (drive) where you want to download your files to. This is done in the toplevel dropdown list. Click there and choose your desired location. - Choose your Dropbox-Folders to be downloaded
If you don’t want to download your complete dropbox content, select the folders to download here by clicking ‘Einstellungen ändern’ (probably ‘change settings’ or something the like in English) - Disable SmartSync once more
Make sure (!!!) that this checkbox “Alle Inhalte sind standardmässig nur online gespeichert” (something like ‘Content is only stored only by default’) is NOT checked
Congrats! Now you have configured everything successfully to force Dropbox to really synchronize your desired content to your local drive. In one of the next steps you might encounter a screen like this:
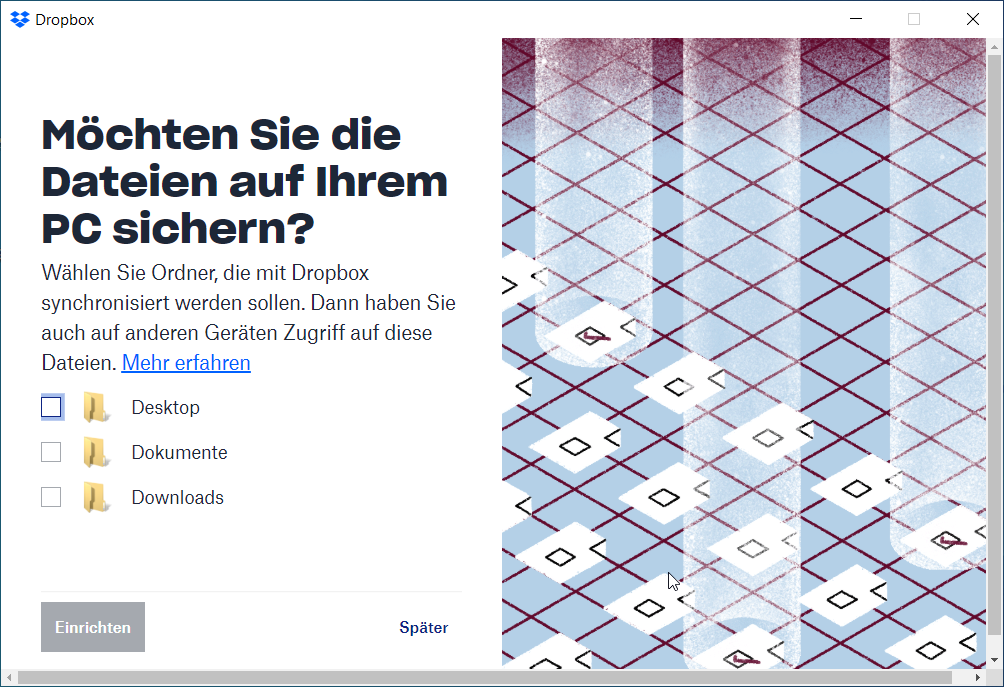
In this screen, disable all checkboxes, if you don’t want additional local files to be uploaded to your dropbox and choose ‘Später’ (or probably ‘Later’ in English).
Now the last step is just to wait until all data has successfully been syncrhonized to your local drive.