Since the 8×8 LED Matrix Display I used in my marquee project is able to display 8×8 pixel sized letters and I am a great fan of the old Commodore 64 I designed the the font according to the C64 charset visible here:
Based on the hardware reference provided here you can get the information on how to communicate the LED display’s clock cycled data to get the expected result.
The first thing is to determine the orientation, which you want the marquee to scroll. This is quite a crucial decision, since the adressing happens in a bitwise manner, as can be seen in the following code section:
    static uint8_t heart[8] = {0x00, 0x66, 0xFF, 0xFF, 0xFF, 0x7E, 0x3C, 0x18};             // this is an array containing the heart pattern
    for ( j=0;j<8;j++) {
          data[0] = ~heart[j];
          data[2] = 0xFF;
          data[1] = 0xFF;
          data[3] = 0x01 << j ;
          wiringPiSPIDataRW(0,data,sizeof(data));              // send data to SPI channel 0, and the length of the data
          delay(x);
   }
To constantly display an image, for each color (red, green and blue) we’ll have to prepare data to be sent in sequential order, telling the different lines j from 0 to 7, which LED should be activated. For each pixel we can choose to be black, light up in red, green, blue or any combination of these. However, combination’s didn’t always turn out to be of a deterministic color, so for best results we’d only use black (no LED active), red, green or blue.
The listing above displays a heart. Please note, that for the heart to light up constantly, you will have to add an infinite loop, constantly firing these 8 same lines. Within my marquee project source you’ll see that we’ll display the same letter-configuration a few times before moving the letters one pixel to the left.
The following sketch shows, how specific pixels can be adressed:
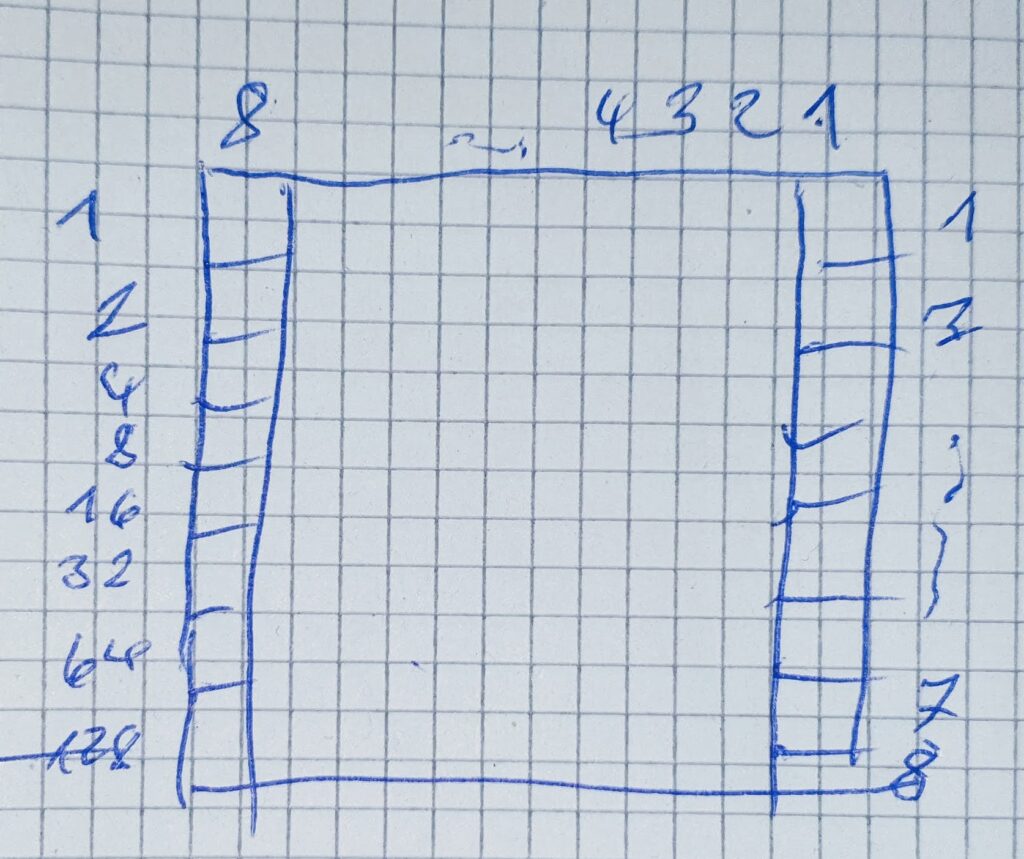
Coming back to our orientation question, in which direction we would want our marquee to scroll, it is obvious, that we don’t want to scroll text in the direction, where all binary patterns would have to be recalculated after scrolling the text by one position to the left. So of course we choose the orientation of the display as shown above and define the display to be rendered from right to left.
For our charset this means, that we have to store the bit-patterns in a mirror-like manner, since the ‘end’ of the letters are rendered first. Let’s see what codes we would have to provide in order to generate the ‘A’ – Letter from the C64 charset:

In order to produce this letter from right to left, we would have to send following bit pattern: 0, 8+16+32+64 = 120, 4+8+16+32+64 = 124, 2+4+16 = 22, 22, 124, 120, 0.
The top most pixel in each column is addressed using 1, adding 2 would adress the pixel from line 2, adding 4 would adress the pixel of line 3 and so on.
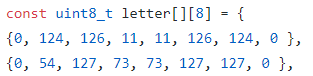
The same numbers you’ll find in the source-code in the letter-array, which starts with the bitpatterns of A through Z, followed by some other characters.
Now you should be ready to extend your marquee font or display whatever you like on your Raspberry Pi’s LED 8×8 Matrix Display. 😉