The aim of this project is to generate a marquee (scrolling text) using a Raspberry Pi and a 8×8 LED Matrix Display.
If you don’t yet have a Pi, get one. I have bought a Raspberry Pi 3B+, which is powerful enough to run a Linux with a graphical UI. There are lots of web-shops you can buy them.
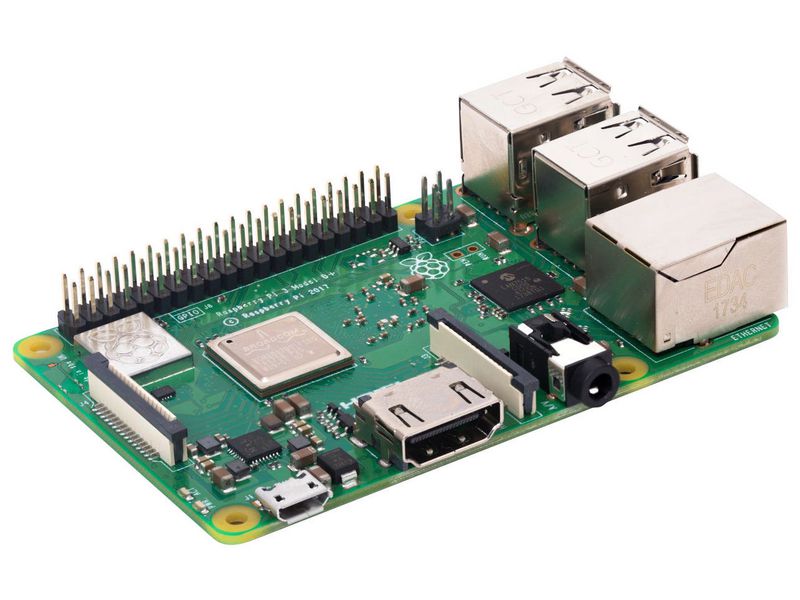
When you decided to buy the same model, you can connect your keyboard, mouse and HDMI Display and easily access your home’s WLAN to access the web. This makes it easier to get started since in most cases you don’t need additional connectors or converters.
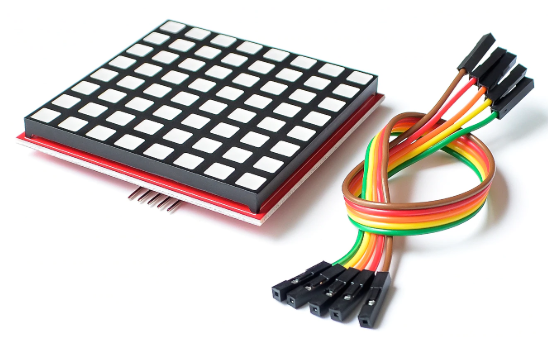
Then you need to have an 8×8 Matrix Display. I chose the following and bought it on aliexpress for about 7 US$:
If you don’t find it and the link to aliexpress is broken, try a search with the words “LED Full Color Dot Matrix RGB LED Display Raspberry 3b+” or some combination of them.
To program your Raspberry Pi, you need an SD-card containing an Operating System (OS) to boot from. If you don’t yet have an SD card, get one (8 or 16 GB should be fine) and install a bootable ISO-image on it. See this post to learn how to set up your bootable SD-card.
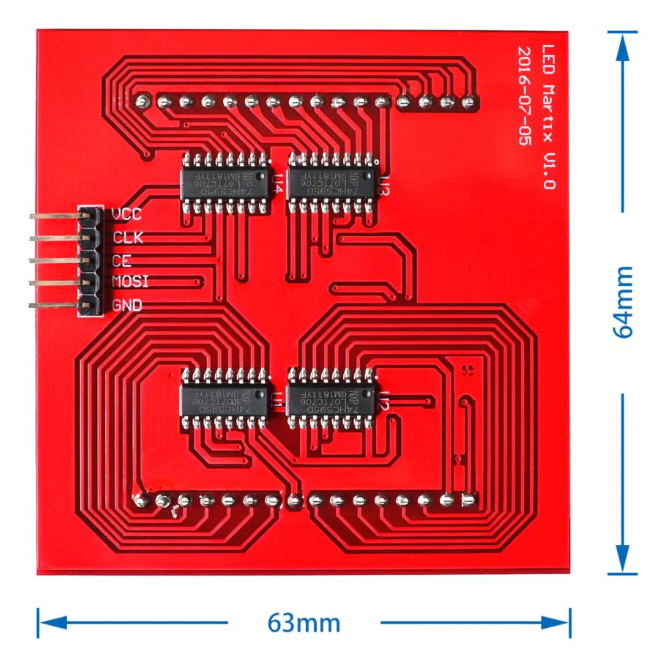
Now that you have all the hardware needed, connect the Display to your Pi. The following Table shows how you have to connect the Display to your Pi (or Arduino):
| Raspberry Pi | 8×8 RGB Matrix | Arduino |
|---|---|---|
| 5V | VCC | 5v |
| BCM GPIO 11 | CLK | Pin 13 |
| BCM GPIO 8 | CE | Pin 10 |
| BCM GPIO 10 | MOSI | Pin 11 |
| GND | GND | GND |
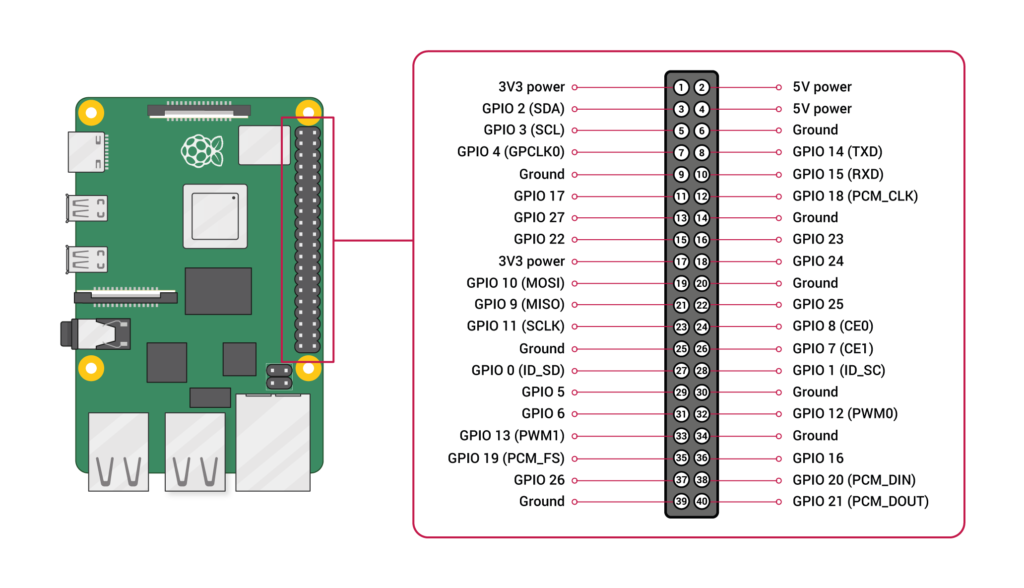
The labels of the Display you can find on the backside of the board, where the cables are attached. The layout of the Raspberry Pi’s GPIO pins you can be found on the official raspberry site which shows an image as follows:
Now that you have connected your LED Matrix Display correctly to your Pi, you can switch it on and boot your linux installation. As soon as you connect your Pi to the power cable, the LEDs should light up in an arbitrary order, while the Pi is booting up.
Now you can start programming the LEDs of your Matrix Display. Sending data is performed via the SPI (Serial Peripheral Interface) using the wiringPi – library. If you have not yet set up this library or have not yet installed gcc, perform the steps described in this post, to make your Pi ready for programming in c.
Now you are ready to start programming your LED matrix display. You can find valuable information on this site, even for driving the matrix display connected to an arduino device.
Based on the source-code provided on that site, togehter with my sons I developed code which displays a marquee on your pi. You can simply get the code from my github repo here and clone the project issuing the following command in a terminal window.
$ sudo git clone https://github.com/phabee/marquee.gitcd to the ‘marquee’ directory, edit the scrolltext to be displayed, adapt the macro MSGSIZE to fit the string-size and compile the marquee.c code with the following commands:
$ sudo gcc -o marquee marquee.c -lwiringPi -lm -lrt -lcryptNow you’re ready to run the marquee:
$ ./marquee